End of Summer Upate

End of Summer Update

(First a quick shameless plug for this vase I bought from my friend and fellow artist Gina Desantis with a hydrangea bloom from Stems Fleur who are just below my studio.)

Summer is drawing to a close. The weather, as I sit here writing, is caught between summer and fall. It’s grey, wet, and some of the first leaves are beginning to drop, but the air is still clinging to me with its insistent summer ardor.

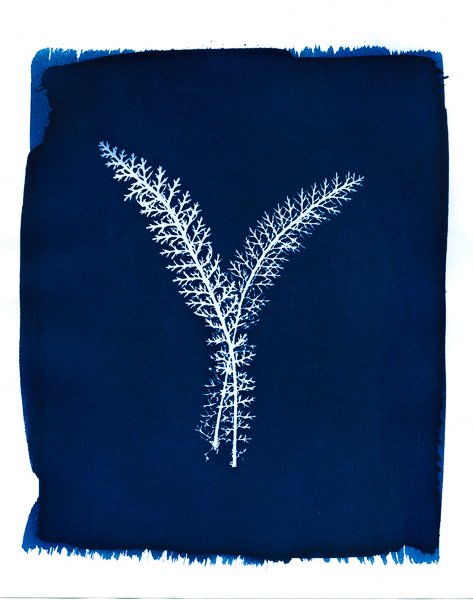
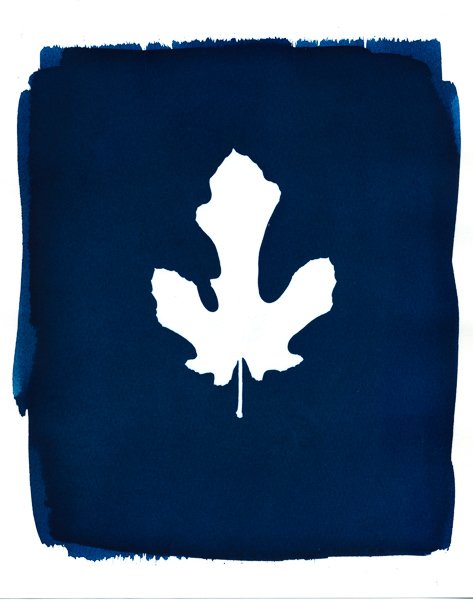
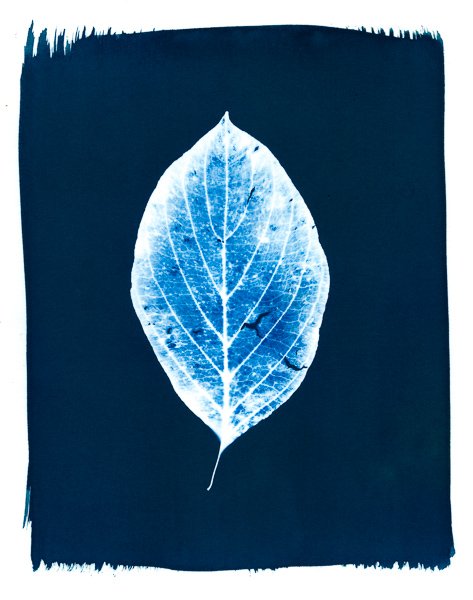
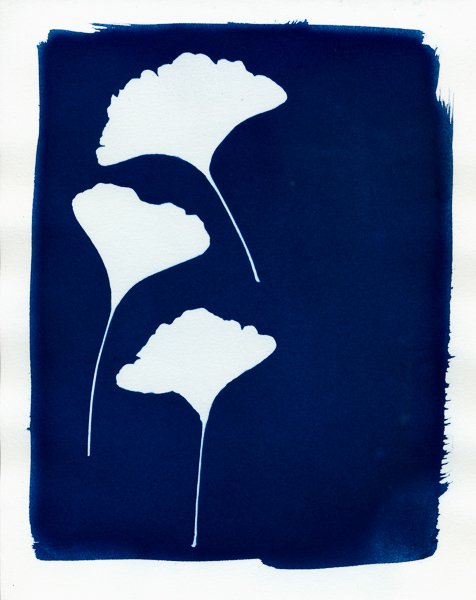
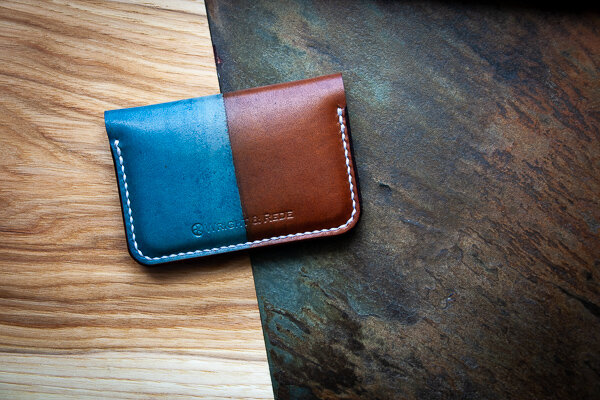
I’ve just wrapped up two new collections. This summer’s cyanotype collection came out in July and then I followed that with what I ended up calling the Scrivener collection. It is a series of notebooks and pen holders. I’m trying to focus in a little more on making things I’d want to own and I love me a good notebook.

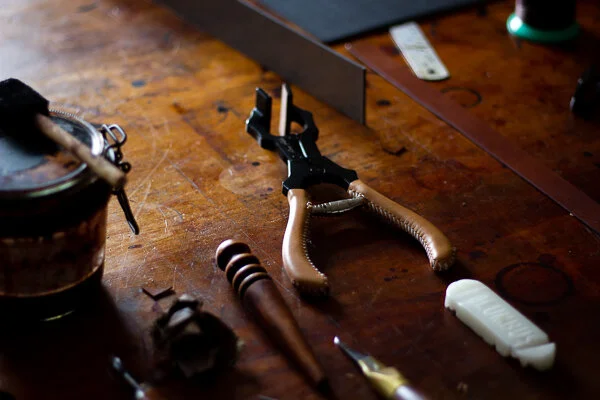
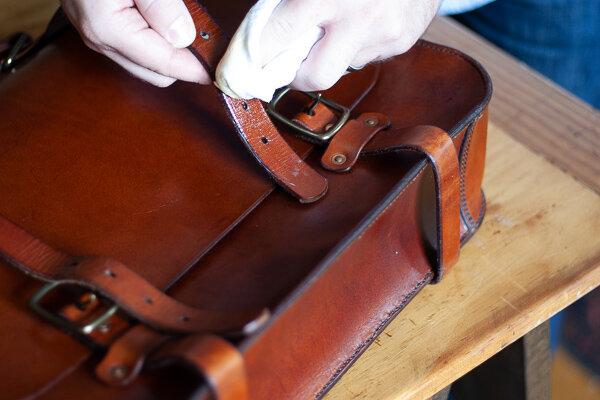
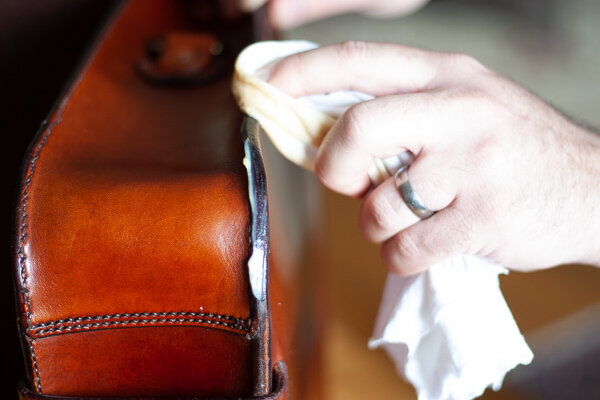
I’ve got a few bag orders to wrap up before September is out. It’s nice to switch up doing something creatively intense like working on special collections, and doing something I’ve done many times before. Those long stretches of quietly stitching seams let my hands do the thinking and my brain take a rest.

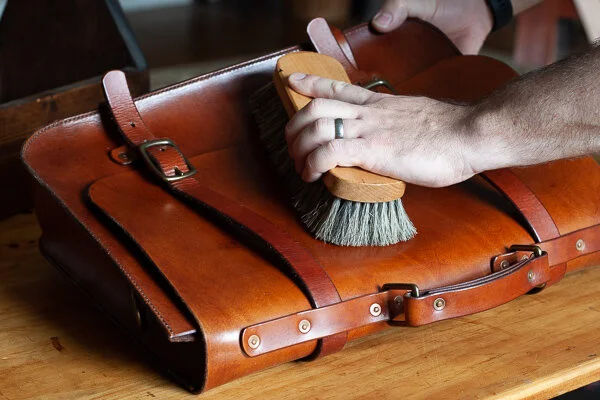
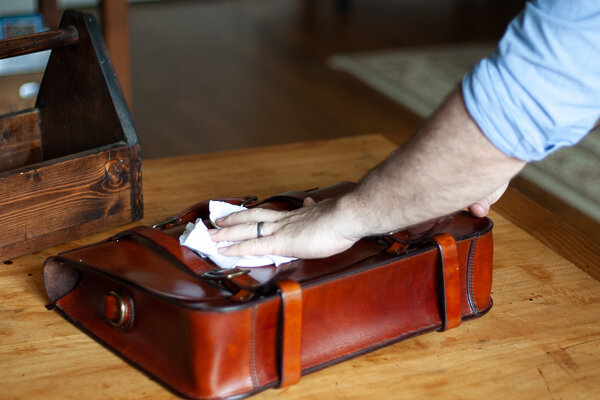
I just finished stitching the interior pocket onto this Lamplighter. I always try to take a picture of this pocket since you can’t really see it once the bag is done.

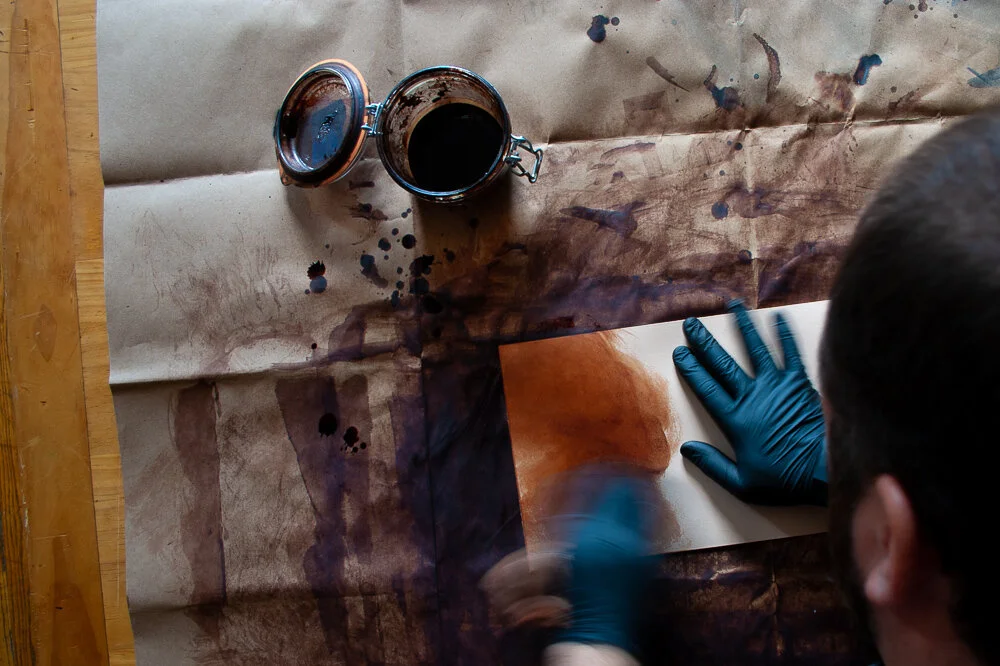
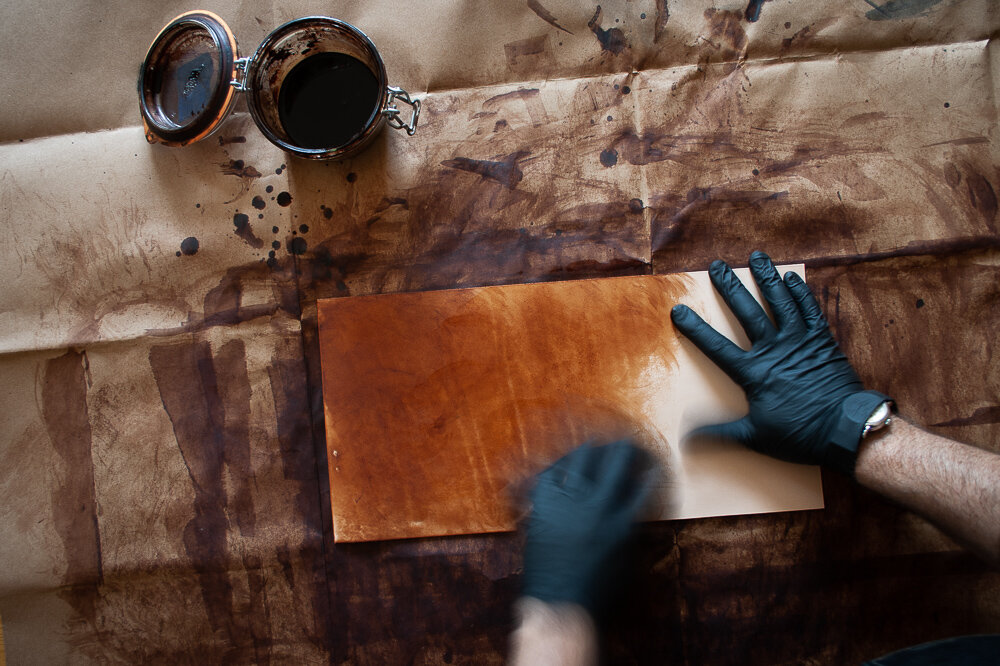
While I’m stitching I’m thinking about what projects I’d like to work on next. The holidays are closer than I realize which means I should be starting to restock all of the standard colors. I also have yet to do an indigo collection this year. I loved last year’s but I don’t want to just repeat myself. I’ve been admiring some work dyers do with wax resists. I’d love to incorporate that somehow, but I fear the learning curve on that means it won’t be part of this year’s collection.

I also don’t really feel done with the Scrivener’s. I’ve taken up writing as a daily practice. I start every day in the studio by writing down my thoughts. It really helps me figure out what is important for the day and keep track of my larger goals. To be honest I’m mostly doing it because I’ve fallen down a fountain pen rabbit hole. It’s really interesting to me how enjoyable it can be to write with a nice pen on a good notebook. It’s one of those little life enriching activities that I love to find. I especially love the idea of having a giant stack of filled notebooks to look back through some day. Old man Jordan shaking his head at today’s Jordan.

Jordan LeeComment
Nine Years of Being Self Employed

Nine years ago today I walked into my day job for the last time. I had just spent almost a decade waffling around trying to figure out what I was supposed to be doing with my life. At the time I thought I was starting a business that was much different that the one I'm actually running right now. I've learned a lot both professionally and personally. On the anniversary of my final shift I like to think back on what I've learned in the past year. This previous year brought a lot of lessons about understanding how a see myself and how that translates into how other people see me.

They way we define ourselves provides clarity. It also creates limitations that we set on ourselves. Don't let the way you currently define yourself box you in. Especially if it's leading you down a path that is unfulfilling. In fact I'd would say the more you step outside that box the more likely you are to succeed.

There is a point at which it is important to master your skills. But ultimately what people will recognize you for, or find you remarkable for, are the things that you bring from outside your area of expertise. People might like a really good baker, but a baker that is a amazing story teller or good at organizing their community will do better every time and I suspect be happier in doing so.

Another thing I think is important to success and one that I am still working on, is being remarkable. I don't mean that in the sense that you should be amazing and wonderful at everything you do. I mean it in the sense that if you want people to tell their friends about you then you need to do something that is worth remarking upon. People tell each other stories. So ask yourself what is it that you are doing that people would be interested in telling their friends about?

The last big lesson I feel like I learned this year is about rest. It sounds dumb to have to say it out loud but you really do your best work when you are well rested. This could mean getting plenty of sleep or taking an extra day off in terms of physical rest. But I'm also talking about the mental rest of not thinking about your job all the time. As a creative person I like to think about my job. I like coming up with cool things to make. But if I try to draw water from that well too many times I'll end up pulling up dry buckets. So putting it all down, not trying to grow or develop , and just giving my brain some time off has proven to be really important. Go do some weeding.

Jordan LeeComment
Dye Tests

Dye Tests

Like Two Trains Passing in the Night

I did a collection back in the fall using vinyl tape and indigo dye. I loved it and even stole one for myself, but I was limited to doing a single color with a contrasting natural stripe.

What I really wanted to do was two different colors. I did a few tests back then but I couldn’t figure out the right way to do it. Either the colors were bleeding into each other or they weren’t lining up correctly. There would be little gaps that didn’t get dyed at all.

A failed dye test. See how the brown spreads into the grey.


But over the past few months I’ve been doing some tests in my spare time. It turns out there’ s no trick or anything to it. Just lots of practice. I’d cut long strips of leather and dye lines on them over and over. After a few months I started getting the hang of it.

So now I’m working on turning that into a new collection. I’ve already started dyeing leather and drawing out ideas. I think I’ll go with a W&R classic of brown and blue to start things off.

Jordan LeeComment
Through a Pinhole

Side Projects

Through a Pinhole

In January I started taking a self portrait every week. I've found that having little side projects like this nurtures my main creative practice. Sometimes this is in very obvious ways, like using cyanotype printing and adapting that to leather working, but often the benefits are more circuitous.

It is no coincidence that I'm doing this pinhole project in January when I spend time planning for the year to come. I think about where my business is and where I hope to be going. In shooting these self portraits I am getting a new perspective on what I've built and where I fit into it.

Shooting with a pinhole camera is a unique experience. Traditionally you can build them yourself out of coffee cans and VW buses. I use a special kind of lens on my digital camera. Imagine a lens cap with a hole drilled in it. Over that hole is a piece of metal with a very tiny pinhole drilled through it. That whole thing fits over where a camera lens would normally go on your camera. This tiny hole is just small enough to project an image into the camera without the need for glass or all the other things that make up a camera lens.

The result you get is a very soft, almost painterly image. There is no way to focus the pinhole. So everything is just a little blurry. Because the hole is so small the time it takes to expose the picture is usually 5-10 seconds. Anything that moves in that time will be a blur in the final image. The picture is also too dark for me to see in the viewfinder. So I can't focus, can't see what I'm taking a picture of, and (because theses are self portraits) I have to run in front of the camera and I hope I'm in the right place when the shutter opens up.

Sounds like a mess, I know. After shooting a bunch in a row I'll start to get these truly candid pictures of me in the middle of trying to make something interesting. Sometimes I'm mid step, or looking a little frustrated after waiting for the timer to go off. Often I'm holding my breath so I don't move too much while the picture is taken. It's all highly staged but in the act of making it I get these chance moments of truth.

Caught mid step, a little frustrated, and holding my breath is about as honest a portrait of being a small business owner that I can think of.


Jordan LeeComment
Around the Curve

Workbench Philosopher

Around the Curve

This damn curve. It’s a pain every time I stitch it. There are little stitch holes on both pieces of leather and they have to line up perfectly for me to stitch them in any kind of straight line. And as we all know from Mario Kart, things that travel along the inside of a curve cover less distance than things on the outside.

So here I’m working on this bag, two weeks of work, and I’m just starting in on the big final push. Then along comes this curve and the holes stop matching up.

Fortunately I’ve done this enough that I know to plan on being frustrated during this part. I know they will line back up once I’ve made my way around the curve. 

That’s one of those little philosophies you find in craft work. There are going to be curves. They are going to be hard and frustrating. But if you plan to expect them, and remind yourself that they aren’t permanent, you’ll get through to the straight side again. Just because things are hard doesn’t mean they are bad. 

Jordan LeeComment
State of the Studio

State of the Studio

Side Projects

I’ve been thinking a lot about what I want my business to look like. Seems like there is a lot of noise out there. There are a lot of people doing a lot of good work and it all looks the same.

When I started doing this in 2012 the online leather working community was new. There were old hands who knew what they were doing but mostly it was people trying things out and learning together. Now it seems like the culture has become codified. There are best practices and jargon handshakes. You know what Tokonole is, right bro? It feels like this has lead to a lot of closed mindedness. That there is a best way to do things. Where ignorance is something to be embarrassed of. At best this leads to a community all following the same guidelines to make the same work. That’s never good for any creative community. I’m sure you’ve seen it in other creative arenas. Don’t know the best kind of ink roller/ distortion pedal/ microphone? Then you don’t belong there. Its just another form of gatrekeeping. I’m not really interested in being a part of it.

So I’ve been turning my attention to other types of work. I’ve gone back to my photography roots and produced a bunch of work that I’m not interesting in profiting off of. I’ve been experimenting with cyanotypes. It’s been satisfying to learn something I’m too ignorant of to hold myself to much of a standard. I’ve done a few that I then painted over with watercolor. I like them a lot but they are still to new to share. Maybe after I get a little more confident with them.

I’ve been shooting a weekly pinhole self portrait. If you aren’t familiar with pinhole photography you take a normal camera, but instead of having a lens on it you use a black card or tin with a tiny little pinhole in it. Believe it or not this works as the lens. You get these really soft almost painterly images. The camera takes 6-10 seconds to shoot the image. So even though I’m standing still I’m going to be a little blurry because I have to breathe and balance and stuff. The other thing is that the pinhole doesn’t give me enough light to see through the viewfinder on the camera. So I have to guess at what I’m taking a picture of.

Self Portrait December 21, 2021

All this to say that I think 2022 is going to be about a lot more than leather work at W&R. I’ll still be doing plenty of that, but there is a lot more that I want to explore with this business. I don’t see any good reason not to. When everyone is doing the same thing it is time to try something new.

Jordan LeeComment
Exploring New Material: Goatskin
IMG_4961.jpg

Natural Goatskin

Texture for Days

I’ve really only worked with one type of leather since I started this business. Undyed (called crust leather), vegetable-tanned, steer hide from Wickett & Craig tannery in Pennsylvania.

It dyes beautifully and the range of colors I’ve been able to get out of it has kept me busy for years. But when I heard about the leather coming out of Pergamena in NY I had to check it out.

Pergamena is a small, family run tannery in the Hudson Valley. The thing that caught my attention is their Leather from Farms program. Working with local farms and abattoirs they are able to source many of their hides from within the region. Traceable, ethically-sourced leather is virtually nonexistent in this industry and I’m very excited to see where they are taking this.

I contacted them about ordering some of their goatskins (something I can’t get from my other tannery) that had not yet gone through the dyeing process. They were able to sort some out for me and I just got my first shipment in. The texture on this goatskin is unbelievable. Kind of like a really smooth, subtle pebbling.

I can’t wait to see how this dyes up. I hope to check back in soon with some of my early tests with this leather,.

IMG_4957.jpg
Jordan LeeComment
State of the Studio
IMG_4254.jpg

State of the Studio

Spring 2021

I’m just coming out of a creative period. I work in seasons. There is a time to dream things up. A time to make them. A time to learn from what I’ve made. Then the whole thing starts over.

I think this period was especially productive because I had a lot of pent up energy leading up to it. I normally take a little time in the beginning of the year to look back at what happened the previous year and plan what I want to do next year.

Didn’t happen this year. A bunch of bag orders had me working away through that period. So when it came time to stretch my creative legs I had a lot of not-yet-fleshed-out ideas floating around. One of the best tricks I’ve picked up in the past few years is creating a good system for recording those half formed ideas. I have lots of scribbled notes spread over a bunch of notebooks to go over.

One of the first things I wanted to take on was a review of the forms I use. Wallet shapes are constrained by the shape of the credit cards you will put in them. When I was just starting out I was focused primarily on function. Over the years as I’ve developed my creative chops I’ve started feeling those constraints more.

For example my style involves showing off what you can do with hand dyeing. The exteriors of my work are always made to contrast or accent the interiors which, unfortunately, you can’t see because they are on the inside of the wallet.

I’m addressing this by changing the form of the design. If the side of the rectangle gets nudged in a little creating a gentle curve then this lets you see just a little bit of the inside when the wallet is closed.

Just a little nudge.

Just a little nudge.

I love the way the stitching looks as it travels along the curve. I was even more surprised by how much I like how it feels in your hand. I’m imagining the curve making a great thing to run your fingers across while you’re waiting at the cash register wallet in hand.

I tested all of this on iterations of the Ensign wallet. I’m now working on adding that nudge to all the shapes I use. It takes a little bit of thought. It has to be scaled up correctly or it looks heavy handed.

Along with that I’m taking a second look at some of my other designs. I’m thinking about redesigning the Hillard in an even slimmer version. Also the Card Sleeve hasn’t been touched since day one. While I value not messing with things for the sake of messing with them, I also think it’s important to experiment with old ideas. It doesn’t hurt to draw things out. Worse case I renew my faith in the existing design.

Oh, and I am finally putting some of my own art up on the walls. The pandemic slowing things down gave me time to start exploring a career I gave more than a decade ago. I feel like I’ve come full circle on that. From giving art up because I wanted to pursue something more practical to finding ways to make practical things more beautiful.

More on that to come.


Jordan LeeComment
The Creative Toolbox: My System for Creative Development
IMG_0206.jpg

My System for Creative Development

The Creative Toolbox

I have a toolbox I use at my studio but you can't see it. I carry it around with me all day and no one knows. It is the most valuable thing I own and no one can ever take it from me.

There is this thought that I heard on the Creative Pep Talk Podcast. Creativity isn't coming up with something that no one has ever seen before. It is taking two existing things and putting them together in a new way.

With that in mind I began to deliberately assemble my toolbox a few years ago. Each tool is a creative process or concept that I've found and developed.

I've always hand dyed my leather work. So that was the first tool in my toolbox. As I explored that process I began to develop new tools. From hand dyeing came color blocking and two tone dyeing.

Two Tone Ensign. Indigo + Chestnut. 2019

Two Tone Ensign. Indigo + Chestnut. 2019

From there sprang indigo dyeing and walnut dyeing. Watching the way dye soaked into the leather gave me the idea of scratching the leather to let the dye seep in more in certain places. That gave way to sgraffito.

Each step I take develops a new tool. When I need to come up with a new idea I look at the tools I have and decide which two to put together.

Working with the color blue is a tool I use a lot. What happens if I combine blue and sgraffito? Or can I do blue and walnut.? What kind of blue? I have a few in my toolbox.

I think this is part of what makes a successful artistic practice. Constantly developing new tools but also having a very clear understanding of what those tools are.

Sgraffito Baseball Stitch Card Case. Chestnut. 2019

Sgraffito Baseball Stitch Card Case. Chestnut. 2019

Picasso has a blue period. VanGough applied paint with a palette knife. Thom Yorke uses falsetto. Tim Burton has the musical. Each one a tool picked up and combined with something else in a way that no one has done the same way before.

I suspect that if you asked your favorite artists what their tools are they could list them out. The really cool part is that it's those tools that come to define the work. The tools you have and the way you use them is what defines your style.

Some of the tools in my toolbox:

  • Shades of blue (Indigo, Prussian, Sapphire, Aquamarine)

  • Juxtaposing cool colors with warm colors (blue and brown)

  • Color blocking

  • Mottled surfaces

  • A wide range of shades from light to dark

  • Clean lines and simplicity

  • Using natural light

  • Using empty space

  • Embracing idiosyncrasies of natural processes (celebrating the marks and scratches)

  • Creating lines and scratches (sgraffito)


Some tools I'm working on developing now:

  • Batik wax resist

  • Leather paint

  • Old photographic processes

  • Story telling

  • Goat skin leather

What is in your toolbox? Can you make a list? It will be hard at first but that is because you are just starting to define your tools. Pick something and develop a small body of work around just that one tool. Repeat that process until you have a couple tools in your toolbox. Then start combining.

Jordan LeeComment
Leather Care
CRW_7645.jpg

A Guide To

Basic Leather Care

Leather Care.

Well maintained leather is leather that gets more beautiful as it ages and lasts for generations. If you want your leather to last and look good while doing so, you are going to need to do a bit of basic maintenance.

But don't worry. I'm going to show you how.

The first step to maintaining your leather is to treat it well. Don't over-stuff it. Don't let it get soaked. If you get something on it take a second and wipe it off.

The next thing you need to do is condition it. Leather is a porous, natural material. Over time and use the oils and fats in the leather will dry out. This is bad because it's those oils and fats that keep the leather strong and prevent it from cracking. Once those oils are gone it is very difficult to get them back into the deepest parts of the leather.

So how do you prevent this?

Leather conditioner applied every six months.

I like to do my conditioning with the changing of the seasons. Once in the Spring and once in the Fall. When the sweaters come out so does the conditioner.

CRW_7703.jpg

Start with a natural conditioner. Avoid anything that comes in a spray, smells like alcohol, has mineral oil or petroleum jelly in it. A good conditioner smells like beeswax. I have used Obenauf's Heavy Duty LP and Skidmore's Leather Cream in the past and have been pleased with both.


How To Condition Your Leather

To condition your leather:

  • Take a soft cloth (an old t-shirt works great) or saddle brush and brush off any surface dirt or grime.

  • Get a little conditioner on your fingers or a soft cloth if doing a large area. Your hands work best for this as the warmth from your hands will help melt the wax as you apply it. You don't need much. Make sure to take off any jewelry that might leave scratches on the leather.

  • Gently rub the conditioner onto the surface of the leather.

  • Pay close attention to getting into high wear areas. Like along any stitching and where the leather bends.

  • Once the leather item is covered in a light coating let it rest for 3-5 minutes.

  • Take a soft cloth and buff off any conditioner that is still on the surface.


Depending on the oil vs. wax content of your conditioner the surface of your leather may have a dull finish. This will go away with a few days of use as the oil penetrates deeper into the hide.

I find treating leather to be very relaxing. It's pretty straight forward and once you are done the difference is pretty clear. Not many tasks like that around. Enjoy and happy conditioning.

Jordan LeeComment
Eight Years Ago
2013-11-25 11.44.19-2.jpg

Eight Years Ago

My very first event.

A little over eight years ago today I did my very first event. I had been making a few items as a hobby and dreamed of owning my own business.

I found a story about an upcoming market in Fresh Water Cleveland. I applied and got in. I didn’t know what I was doing.

The week before I had to figure out how to take credit card payments. I don’t think I had any packaging. If you bought something you just put it in your pocket. We put price tags on things after we got there. I think I was still pricing my work using the “Hmm, how much would I pay for this?” method. The table my display is on isn’t mine.

I made $337.00 that day. That was more than I made in a day waiting tables (my day job at the time). I forgot to account for the weeks worth of labor that led up to that day.

I remember selling a leather double wrap bracelet to Rick (of Rick & Randy ((HI RICK AND RANDY)). I made my first vendor friends. I learned all about how much I didn’t know.

2013-11-25 11.44.21.jpg

After this first event I would do at least one event a month for the next five years. You pick up all kinds of useful skills. How to park aggressively and in unusual locations. How to properly ballast your show tent in high winds (4” pvc tubes filled with cement). How to make friends at 5am in the rain

The most useful lesson is one of resilience. It’s hard to spend a day not selling a thing, worrying about your future, and still keep a friendly smile on your face. Once you have a year’s worth of shows under your belt you’ll learn there is no rhyme or reason to it. Sometimes you kill it. Sometimes you don’t even sell enough to cover the fee you paid to have a table there.

I don’t do events like this much any more. The landscape has changed. When I started there weren’t many markets around like this. Then there were too many.

I miss them a little. I don’t miss setting up a tent at 4am. Nor do I miss standing in a field of asphalt all day in the middle of the summer heat.

But I miss my friends. I miss the camaraderie of being in it together. I miss the excited faces of people seeing new things. I miss getting to watch people interact with something I had made.

Running your own business is the path less traveled. You spend much of your time out in the weeds hoping you’re going the right direction. But then when you take a look back at where you’ve come from all those twists and turns make more sense.

There is nowhere I’d rather be.

The goods. Feb 23rd. 2013.

The goods. Feb 23rd. 2013.

Jordan LeeComment
The End of the Year.
IMG_3675.jpg

Time to Reflect and Breathe

End of the Year.

What a year.

Twenty days into 2021 and I’m still trying to wrap my head around it.

Around this time last year I was hanging pictures on the walls of my studio. I had notebook pages filled with plans for what I hoped to do in 2020. A month later I would be reading about about Covid in the US. A month after that I would pick my son up from preschool for the last time. Shortly thereafter I went to my studio, packed up what work I thought I could do for the next few weeks, and prepared to follow quarantine rules.

March 22nd, 2020.

March 22nd, 2020.


In the ensuing weeks my problems compounded. I was nearly out of leather when everything shut down. My tannery which normally takes two weeks to get me a leather order was down to a skeleton crew. More leather wasn’t going to arrive for at least six weeks. Rent was due soon and I didn’t have much to sell.

I have a page in my notebook called “How the Hell do I Make Rent with What I have?” Underneath is an inventory of all the leather I had on hand. I knew exactly how much I could produce but I had to make sure that everything I made I sold or I wasn’t going to be able to cover all of my expenses that month.

To design, produce, and completely sell out a collection in under two weeks is a tall order. I knew I had to make something remarkable, something that coudn’’t be found anywhere else, and still be able to offer it at a fair price.

The 2020 Pandemic Collection getting made.

The 2020 Pandemic Collection getting made.

So I went to my “toolbox” and pulled out all the stops. I hand dye everything. The two toned items are always popular. I did a sgraffito project a while back they people loved. I took those two ideas and drew up some ideas for my best selling designs. I got to work.

The collection sold out in 16 hours.

I’m not telling you this to brag. I want to illustrate an important lesson I learned. When you push yourself to produce the work that you are uniquely suited to make and then channel that into what your customers are asking for you end up with extraordinary results.

So this year I’m looking to liberate myself from what my peers are doing. I’m focusing on what I can do. Part of that will be a mental shift from thinking of myself as a craftsman and more of as an artist. I’m looking to expand the creative work I do and let that influence the leather work I do.

Most importantly I’ve learned how resilient we all are. So much has changed and there is so much uncertainty. But when you keep showing up you find that there are other’s who will show up with you.

For 2021 I wish you more of the same. More slowing down and exploring our surroundings. More sincere connection with loved ones. More being mindful of how we choose to spend our time and money. More time outside and more time thinking about what kind of future we’d like to live in.

Jordan LeeComment
Making a Mercer Briefcase. Part 6.
IMG_3373.jpg

The Finished Bag

Making a Mercer Part 6.

Start to finish it takes 2-3 weeks to get here. From starting with sides of un-dyed leather to the final stitch.

The last step to anything is to condition it and give it a final polish. The importance of proper conditioning can’t be overstated.

Well oiled and moisturized leather is strong, beautiful, and flexible. Once the leather dries out it will crack. Once that happens there is nothing that can be done to fix it.

I recommend continuing to condition the leather every six months hereafter. Over time the leather will grow a bit softer and darker. The repeated application of conditioner + time will result in the deep rich patina that only vegetable tanned leather is capable of.

I think of everything I make as a collaboration between me and those that will use my work. What I’ve made here is the starting point. What this bag finally becomes is up to the person that uses it.

Thank you for following along.

IMG_3412.jpg

The End.

Jordan LeeComment
Making a Mercer Briefcase Part 5.
IMG_3303.jpg

The Big Stitch

Making a Mercer Part 5.

So far we’ve cut. We’ve dyed. We’ve shaped. Now it is time to put the whole thing together.

This is done with a special stitch called a saddle stitch. One long thread, with a needle on each end, is passed back and forth through the slanted holes that will make up the seam. Since both the front and back of the seam are stitched at the same time this technique creates a unique situation in which each stitch is held in place by the stitch before and after it. This is a much stronger and more durable stitch that anything that can done on a sewing machine. It can only be done by hand.

IMG_3273.jpg

It is a slow and steady process. To give you an idea, a three foot long seam done on a machine might take 20-30 seconds. The same seam done by hand can easily take 2-3 hours depending on the complexity of the seam. When you look at the bigger picture however, 2-3 hours on a seam that might last a few decades doesn’t seem like that much time.

If you were to ever wonder why handmade leather goods are so damn expensive this is why.

IMG_3291.jpg
Jordan LeeComment
Making a Mercer Briefcase: All the Small Things
IMG_3285.jpg

All the Small Things

Making a Mercer Part 4.

This next step I think of like getting my mise en place together. All of the small components have to be made and then attached to the bag.

This step includes adding handles, riveting and stitching the top of the bag to the back, attaching the d-rings where the shoulder strap will connect to the bag, and the tuck clasps that will keep the bag closed.

The tuck clasp is installed with little screws on the back. Another strip of leather has been stitched in place to strengthen the part of the bag that will be pulled on to open the bag and add an interesting detail to the otherwise plain front.

The tuck clasp is installed with little screws on the back. Another strip of leather has been stitched in place to strengthen the part of the bag that will be pulled on to open the bag and add an interesting detail to the otherwise plain front.

This process is by far the longest part of anything I make. Extra attention is required because any missteps at this point will result in things like the bag being crooked when closed or the handles coming off under stress. Bad things all around.

IMG_3190.jpg

It is exciting to see all of the separate parts coming together. I start to finally get an idea of what this briefcase is going to look like.

Kind of a seeing the forest through the trees moment.

Mid-riveting on this Mercer. Those metal bits you see sticking up will be nipped off then rounded over to set the rivet in place. This is the strongest way of attaching something like this to a bag. Built to last.

Mid-riveting on this Mercer. Those metal bits you see sticking up will be nipped off then rounded over to set the rivet in place. This is the strongest way of attaching something like this to a bag. Built to last.

Jordan LeeComment
Patina
IMG_3041.jpg

Aging Gracefully

Patina

Ah. Vegetable tanned leather. Among all the wonderful things it does (the smell, that creaky noise it makes when it’s new) the way it ages is it’s best property.

A good patina is built with years. No two things will age the same. The way you carry it. How you choose to take care of it. The stress of the day and the weight of time. All imprinted like a signature. Unique to you. A collaboration between you and time.

There is no trick to developing a good patina. Clean and condition every six months. Use it as much as you can. Learn to appreciate the dings and stains that happen. Someday those will be your favorite parts.

Mostly it is a question of stopping to pay attention and accepting the little imperfections that color in our days.

Some day someone will see this thing you’ve made and know that there is a story there. Just as you were that person once too.

My two toned Belhoste in indigo and chestnut. The title picture is at 6 years of age. This picture is at 3 years.

My two toned Belhoste in indigo and chestnut. The title picture is at 6 years of age. This picture is at 3 years.

Jordan LeeComment
Making a Mercer Briefcase Part 3. Custom Colors.
IMG_3079.jpg

Custom Colors

Making a Mercer Briefcase Part 3.

This is the part of the story where I get to tell you this isn’t an ordinary Mercer.

I’ve started offering custom color options with made-to-order items. Maybe I’m stodgy but I didn’t think there would be that much demand for it. Which is strange since I’ve built my business around hand dyeing.

I’ve only done a few in custom colors but I love what people are coming up with. It’s a challenge for me as a maker. Helping decide what parts should be changed so the result is different but still looks like my work. I don’t want the colors to look gimmicky and including them in a way that makes sense is a new challenge.

It’s fun too. I think of all of my work as collaborative. I make the raw material, but in my mind the finished product is years old and worn in. So anything I make is a project between me and the person I am making it for. This is just taking that one step closer to direct collaboration.

On this Mercer the owner has chosen sapphire blue for the handle and d-ring attachments. It think it’s going to look stunning. The kind of thing that gets you to stop and take a second glance.

Freshly dyed, sapphire blue leather. Drying on the corner of my workbench.

Freshly dyed, sapphire blue leather. Drying on the corner of my workbench.

Jordan LeeComment
The Manifesto
IMG_2795.jpg

Someone once told me that if you don’t tell people where you stand they will put you in your place.

When I started Wright & Rede I wrote out ten core principals that I feel any worthy business must follow. I keep a copy on my desk at the studio and I refer to it often. When I need advice or have a big decision to make it’s what I turn to first.

The Manifesto

  1. Everything has a cost. Be that cost time, money, thought, or respect. Something of value has a worth greater than what is spent for it. Create things of value.

  2. Any commercial entity acting in modern society has a responsibility to the welfare of the community from which it profits.

  3. There are no substitutes for integrity, style, or common sense.

  4. Complacency breeds mediocrity. When deciding between two choices, choose that which is less comfortable.

  5. If it's cool, but not useful, it's not cool.

  6. The best solution is always the simplest one. Avoid artifice and gimmickry.

  7. Beauty and practicality are not mutually exclusive. Create beauty in the commonplace.

  8. Authenticity cannot be bought, sold, or copied. It can only be lost.

  9. Aiming for the lowest common denominator will only create something that is beneath us all.

  10. Be the author of your own story. Write one that is worth retelling.

Making a Mercer Briefcase Part 2.
Hand dyeing and burnishing vegetable tanned leather.

Making a Mercer. Part 2.

Hand dyeing.

I started Wright & Rede with $150.00 I had set aside from my tips waiting tables in a restaurant. In the early days I had to be creative with how I spent that money.

Leather is typically sold by the side (half a cow). On average that’s 20 square feet and can cost between $100-$300. So in the beginning my $150 would buy me one side, which meant one color of leather at a time.

I realized that if I purchased un-dyed leather I could have all the colors I wanted if I dyed it myself. Problem solved. I soon discovered that hand dyeing is an art form in itself. There is a reason large scale tanneries do it with sprayers or in vats.

I’d describe hand dyeing as similar to watercolor painting. I have a rag loaded with wet dye. The first place I set it down on the leather is going to get a big dark blob. Then there will be streaks, blotches, and areas that just don’t take as much dye. It used to drive me nuts. I wanted the uniformity I saw in professionally dyed leather.

It was when I stopped looking for something that looked factory made that I really started to see the potential. I’ve always belived that the best crativity comes from limitations. So I leaned into the inconsistencies.

After eight years of practice I’ve developed a method I’m pleased with. Using heavy dilutions of dye combined with multiple passes, and some confidence with what I’m doing, I am able to produce work that is unique to me. No one will ever be able to apply dye in quite the same way. Much in the same way two painters will paint the same scene differently or that no two finger prints are the same.

As a result each and every piece I make is completely unique. What I once saw as a handicap has become something by which I define my style.

IMG_0897-2.jpg
Making a Mercer Briefcase Part 1.
Cutting out the leather.

Making a Mercer Briefcase.

Part 1.

The first step to anything I make is cutting out large strips of leather.

The leather I use is vegetable tanned leather from Wickett & Craig in Pennsylvania. You’ll notice the leather is un-dyed at this point.

Using a very sharp clicking knife, I’ll cut a section of leather that is slightly larger than what I need. After the leather dries from the next step, dyeing and currying, the leather will shrink a little.

The templates set out on the leather. I’ll spend a few minutes looking at the grain and surface marks on the hide to decide if there is anything I want to avoid or highlight.

The templates set out on the leather. I’ll spend a few minutes looking at the grain and surface marks on the hide to decide if there is anything I want to avoid or highlight.

Once I have my templates where I want them, I will take a straight edge and use a scratch awl to make a light line along where I want to cut. I’ll then go back over that line with a heavier stroke with the awl. This creates a little groove for the knife to ride in when I make the final cut.

All cutting is done with a sharp blade. I keep a strop on hand to make sure. I’ll remove the straight edge, set the knife in the cut line, and cut it free hand. With the groove from the awl there aren’t any wandering cuts.

The last pass with a sharp clicking knife.

All that is left in this step is to make a note on the back of each strip to let me know what they are and what color. Then its onto dyeing and currying.

Jordan LeeComment